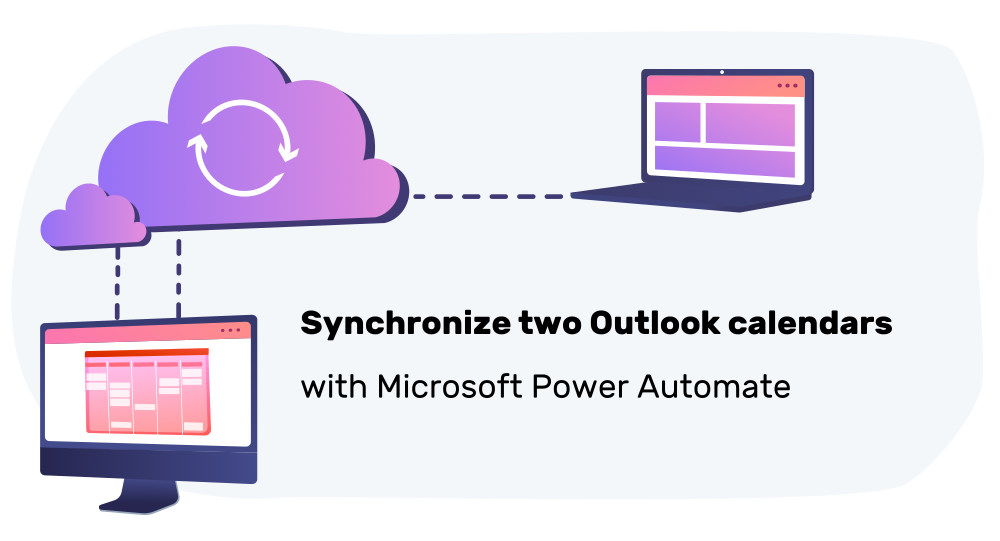
Having multiple calendars that are not synchronized often causes scheduling issues. To solve this problem, this post offers a Microsoft Power Automate flow to synchronize two Outlook calendars, as well as pseudo code of the synchronization algorithm. I explain the approach, and how it evolved from previous iterations (including their shortcomings).
New “next-gen” version available
Please head over to this blog post where I present the Next-Gen of the Power Automate flow. It is 30x faster and also supports synchronizing Outlook with Google calendars (or Google with Google). However, it requires that you pay for the Premium plan of Power Automate!
Introduction
Managing your calendar events and availability at work is problematic if you have multiple calendars in different organizations. Here is a typical example scenario you may encounter:
- You work in company #A which does some kind of work for your client, company #B.
- #B creates external guest accounts for the employees of #A (for various technical reasons), meaning that employees of #A get an additional email and calendar account in #B (but employees of #B do not have such a guest account in #A).
- Suppose that both #A and #B use Microsoft 365.
This scenario causes the following problems regarding scheduling of events, due to the lack of synchronization of the two calendars:
- Employees from #B will invite employees from #A to an event without knowing their actual availability (in the #A calendar). Employees of #A do not manually create events in both calendars, because it would be burdensome. The same problem happens in the other direction (when employees of #A invite people from #B or #A at time slots where they are already occupied, according to their #B calendar).
- People from either organization may miss out on events, because showing multiple calendars at once results in a crowded, illegible view in their email client. Consequently, most people only activate their own organization’s calendar, and are not shown any reminders for events that exist only in the other company’s calendar.
To solve these problems, I built a Microsoft Power Automate Flow. It regularly accesses both of your Microsoft 365 calendars. For every event in calendar #A it creates a corresponding blocker event in calendar #B, and vice versa. You can configure
- how often the flow should run (e.g. every 2 hours),
- the synchronization time window (measured in number of future days to synchronize, e.g. 30 days),
- the prefix of each blocker event’s subject, meaning that an event with subject “Sprint Retrospective” in #A creates a blocker event titled “SyncBlocker: Sprint Retrospective” in #B, where the “SyncBlocker: ” prefix is configurable.
With such a regular synchronization in place, all that is left is for #A to communicate to #B employees that if they organize an event, they should always invite the #B guest accounts of #A-employees, rather than inviting #A-employees with their #A email address. This means that employees of #A still need to check mails in their #B guest account, to accept or reject event invitations, but they do not need to configure both calendars in Outlook.
Building this solution took me multiple iterations (more details below) and it was quite a lot of work. I wish there was an easier way. But alternatives I looked at always had some issues. For instance, let’s consider the subpar alternative of sharing your calendar. Being an #A employee, you could share your #A calendar with #B-employees. But that results in administrative effort for you, because you have to maintain the list of individual #B-employees you are sharing your calendar with. You also have to educate #B-employees to always invite your #A email address, and this might be politically difficult when #B expects #A to use their #B-guest-accounts.
Solution approach
When I did my PhD in synchronizing file systems, I also studied general data synchronization problems. The problem we need to solve in this particular case (calendars) is to apply two uni-directional synchronizations (from calendar A → B and B → A). With this approach, any change you make to the sync blocker events in the target calendar will be overwritten on the next synchronization, which is desired behavior (and this is why I did not solve the problem via bidirectional synchronization).
To get this synchronization scenario right, you need to take care of two things:
- You need a stable identifier that helps maintain a relationship between a calendar-A-event and its corresponding calendar-B sync blocker event. This identifier helps you find (and update) the corresponding sync blocker event, if the calendar-A-event changes (e.g. its start/end time, subject or body).
- You need to avoid infinite loops, which would happen if a calendar-A-event is synchronized to calendar B, that event is then synchronized back to calendar A, and so on, causing infinitely many duplicated events.
These two problems are solved as follows:
- The Outlook calendar backend automatically generates a stable and unique ID for each event. When creating a sync blocker event, we need to write that original event’s ID to some field of the sync blocker event. I decided to use the
locationfield, because all other fields seemed unsuitable to me. - To avoid infinite loops, I decided to add a prefix string to the
subjectfield of a sync blocker event. The synchronization algorithm skips synchronizing those events, thereby stopping infinite loops. That prefix should be unique enough so that the chances are ~0% that I (or someone else) deliberately creates events that start with that prefix. I could also have used a different data field (e.g. adding a unique prefix to thebody), but I like the side effect that I can discern calendar-A-events from sync blocker events at a first glance, just by looking at the event’s title/subject.
The following snippet shows the synchronization algorithm as TypeScript-esque pseudo code. Feel free to use it to build your own solution without Power Automate.
daysToSync = 30  // or any other number
syncBlockerEventPrefix = "SyncBlocker: " // or any other prefix
// Limit creating SyncBlocker events for only those events to which you responded in one of the following ways:
eventResponseTypes = ["organizer", "accepted"]

// Retrieve both calendars, such that cal1 and cal2 are arrays of objects with
// fields such as "subject", "body", "id", "location" or "responseType"
cal1 = getEventsFromCalendar(id=calId1, from=now(), to=now()+days(daysToSync))
cal2 = getEventsFromCalendar(id=calId2, from=now(), to=now()+days(daysToSync))

// Initialize filtered helper-arrays
syncblockerCal1 = cal1.filter(event => event["subject"].startsWith(syncBlockerEventPrefix))
realCal1 = cal1.filter(event => !event["subject"].startsWith(syncBlockerEventPrefix) && eventResponseTypes.contains(event["responseType"]))
syncblockerCal2 = cal2.filter(event => event["subject"].startsWith(syncBlockerEventPrefix))
realCal2 = cal2.filter(event => !event["subject"].startsWith(syncBlockerEventPrefix) && eventResponseTypes.contains(event["responseType"]))

// In cal2, create missing SyncBlocker events, or update the start/end times (or body/subject) of already existing SyncBlocker events
foreach (e in realCal1) {
  matchingCal2SbEvents = syncblockerCal2.filter(event => event["location"] == e["id"])
  if (isEmpty(matchingCal2SbEvents)) {
    createEventInCalendar(id=cal2Id, subject=syncBlockerEventPrefix+e["subject"], body=e["body"], location=e["id"], start=e["start"], end=["end"], timeZone=e["timeZone"], status="busy")
  } else {
    if (matchingCal2SbEvents[0]["start"] != e["start"]
      || matchingCal2SbEvents[0]["end"] != e["end"]
      || matchingCal2SbEvents[0]["body"] != e["body"]
      || matchingCal2SbEvents[0]["subject"] != syncBlockerEventPrefix+e["subject"]) {
      updateEventInCalendar(calId=cal2Id, eventId=matchingCal2SbEvents[0]["id"], subject=syncBlockerEventPrefix+e["subject"], body=e["body"], start=e["start"], end=e["end"])
    }
  }
}

// Find and delete orphaned SyncBlocker events in cal1
foreach (e in syncblockerCal1) {
  matchingRealCal2Events = realCal2.filter(event => event["id"] == e["location"])
  if (isEmpty(matchingRealCal2Events)) {
    deleteEventInCalendar(calId=cal1Id, eventId=e["id"])
  }
}

// Repeat both foreach-loops, but swap "1" with "2" for all variables (code omitted)Code language: JavaScript (javascript)
Step-by-step instructions to synchronize two Outlook calendars
Let’s see how to set up my Power Automate flow (that synchronizes two Outlook 365 calendars) in your own Power Automate environment. Please note that you need a corresponding subscription to be able to import the flow as a zip archive (or you set up the flow yourself, following the above pseudo code algorithm).
Try this first if you have a free Microsoft account
Before you continue reading the rest, I recommend that you first verify whether the importing feature is actually available to you. Open https://make.powerautomate.com, and click My flows → Import → Import package (legacy). If you see an Upload form, you are good to go, otherwise you’ll need to pay for a subscription.
First, set up the two Outlook 365 connections. On https://make.powerautomate.com, click on Data → Connections and add two “Office 365 Outlook” connections (for the calendars #A and #B), following the on-screen instructions.
Next, download my flow as zip archive from https://github.com/MShekow/outlook-calendar-sync.
Back on https://make.powerautomate.com, click My flows → Import → Import package (legacy), click the Upload button, and choose the zip archive you just downloaded. In the form that is shown afterwards, click the links in the “IMPORT SETUP” column to fix any errors. The first row lets you configure the name of the flow that is created, and in the second and third row, you need to choose the two Outlook-connections you created earlier. Finally, click on “Import”.
Next, we need to activate the flow, because it has been imported in a deactivated state (in which we cannot even trigger a test run). To do so, open the imported flow and click the “Turn On” button in the top menu.
Next, we need to tune the settings of the flow and test whether it works as expected. Click on “Edit” to open the editor, then click on all those actions at the top that start with “Setting” and change the values as you want them. I added an explanatory comment to each setting that explains what it does. I highly recommend that you initially change the “Days to sync” setting to 1 day, then save the flow, and click on “Test” to run it.
In the very first run, it is important to get the names of the calendars right (see actions “Setting: name of cal1/2”), or no synchronization will happen at all. Open your first run of the flow, and expand the “Check that calendars exist” action at the bottom. If you do not see any green checkmarks in the “If yes” half, the calendar names are not configured correctly yet. In this case, scroll up again, and expand the blue “Get calendars of Outlook account 1/2” actions. Take a look at their output (click Show raw outputs for better readability): the body > value > name field tells you the name of your Outlook calendar, as returned by the Outlook APIs. Please note that the returned name may differ from the calendar’s name shown in the Outlook UI. If the value of body > value > name of the calendar you want to synchronize is not “Calendar”, you need to open the edit view of the flow again and update its actions “Setting: name of cal1/2” respectively. Save the flow (top menu) and then run another test.
If the calendar names are correct, you should verify (in Outlook) that your calendar events have been synchronized properly. For each event you should see blocker events in the other calendar (whose location field contains a long string of hexadecimal characters). Only if this is the case you should increase the “Days to sync”, and save+test the flow again. Please be aware that Power Automate is rather slow, so it’s perfectly normal if a test run takes a long time (e.g. 15 minutes for synchronizing 30 days). You can also check which write-operations were done by a flow execution, by expanding the “Check that calendars exist” box and then click on the very bottom action of that specific flow execution.
Power Automate limitations
Depending on your Power Automate plan, there are various limitations (see documentation). Most notably, the “Action request limits” limit the number of triggerable actions to 10’000 per day. Power Automate counts the requests in the worst possible way (for you): exemplary, if you have a for-each-loop that loops over 5 items, and you define two actions inside the loop, Power Automate counts these as 5*2=10 action requests. Consequently, you need to experiment with the number of days you want to sync, and the number of flow executions per day, to stay below the action request limits.
Privacy considerations
By default, my Power Automate flow copies your event’s subject and description into the blocker event. You might not always want this to happen. For instance, if the second Outlook account is administrated by a third party (e.g. a customer of your organization) you do not have any real control over that Outlook account. You do not know who else can really see the content of these events. The subject or description of the events of your main account might contain sensitive details, such as URLs to internal documents, which you might not want to leak into the Outlook account of a different tenant.
To avoid this, I have added a setting called “Setting: hide event details in calendar 1/2” in version 0.6, which lets you to hide these details. If you set it to true, the synchronization code will instead leave the description empty and use a dummy “Blocker” title for the blocker events it creates.
Learnings
It took me about 12 hours spread over multiple weekends to get the flow to its current working state that I consider “shareable”. I had to learn some truths the hard way, through experimentation.
Event-based flows
Initially, I started with an event-based flow (not a scheduled flow), where I used the “When an event is added, updated, or deleted (V3)” trigger, with a bunch of “if / else” blocks (and using the “Get Events” action) to determine what to do with the event. However, this solution had many problems:
- It required configuring two flows (one for each sync-direction), and the logic was (in hindsight / comparison) much more complicated than the logic of the schedule-based version.
- The Power Automate platform executes this trigger very often, which leads to throttling of the flow. For instance, the trigger executes when an event merely approaches (that is, when Outlook shows you the “15 minutes” notification). If it is a recurring event, the trigger is executed for many future instances of that event (sometimes dozens at once). Due to this spam, there is no way to debug flows, because there are hundreds of executions per day, and I wouldn’t even know which ones to look at if I wanted to diagnose a bug (e.g. a duplicated sync blocker event).
- Because the synchronization trigger does not cover existing events, you would have to wait for an entire week for the synchronization to cover all events.
- There are race-condition-related bugs leading to many duplicated blocker events (or failed flows). This is because the flows do not have a deterministic execution order or speed, and there is no atomicity. As a simple example: suppose you accept an event invitation at 10:00, and at 10:05 you decide differently and delete/reject the event. This triggers two flow runs (#1 and #2) that start at these respective times (10:00 and 10:05). In a perfect world, run #1 would complete, then run #2 would be executed. However, in practice, this can happen: at 10:01, run #1 already has verified that it needs to create a blocker event, but is now throttled mid-way, so that the actual “create event” action won’t be run before 10:10. Run #2, however, is not throttled and finishes by 10:06, not doing anything, because it did not even find any blocker event that it should have deleted. The end result is that a sync blocker event has been created, even though there is no originating event anymore. In hindsight, such a problem could be solved by disabling concurrent runs in the Concurrency control settings of the ‘When an event is added, updated or deleted (V3)’ action.
Slow speed
Power Automate is dead slow. For me, it takes about 15 minutes to synchronize 30 days worth of calendar events (which is about 120 events, coming down to ~6 events per day in a working week). The for-each loops are particularly horrible: a task that would take a slow language (such as Python) about 5 milliseconds takes about 10 minutes in Power Automate, e.g. iterating over an array of 120 items, filtering another array for matching values (not doing any network calls via Outlook-event-read/write/delete actions).
Scheduled flows have problems, too
Just like event-based flows, scheduled flows can also into throttling issues. These can be reduced by not running the flow at night, and also by disabling concurrent runs in the Concurrency control, to avoid completely overloading Power Automate. This requires that you manually overlook the flow executions during the first days after setting up the flow, to check that all flows executed successfully, or to reduce the execution frequency or number of future days to synchronize. Another disadvantage of scheduled flows is that the synchronization has a much higher delay than event-based synchronization.
The Power Automate UI is a PITA
Using Power Automate reaffirmed my loathing of low-code tools. While the visual blocks of low code tools reduce the learning effort that I would otherwise need to put into figuring out the right code snippets (e.g. to query the Outlook calendar), this quickly slows you down. Once your flow has reached a certain level of complexity, expanding all its action boxes results in a huge, unmanageable canvas in which I get disoriented immediately. I also found the Power Automate UI to be generally “jumpy”, with popups moving around randomly, or not closing properly. And it is slooooooooowww.
Conclusion
I built this solution out of a personal need, where the lacking synchronization between my employer’s calendar and our customer’s calendar caused me considerable scheduling headaches.
The implemented Power Automate flow synchronizes two calendars, but it can be extended to synchronize three or more calendars: just duplicate the flow, always set the same Outlook calendar as the “cal1”, and use a different sync blocker prefix for each flow duplicate. The result is a star-shaped synchronization pattern, e.g. synchronizing A with B, A with C and A with D.
If you need such a calendar synchronization, but want to implement it by other means than Power Automate, you can adapt the pseudo code I presented above and build a solution in any other programming language. If you need a synchronization that does not involve Outlook but Google calendars, you may be able to reuse the Power Automate flow I built, and replace the Outlook-specific actions with Google calendar actions, which are included by default (for free) in Power Automate.
Did you have calendar issues of a similar type? How did you solve them? Let me know in the comments or on LinkedIn.
Oh man, thank you SO much. I was thinking how I could handle this, and was really hoping somebody had a good solution published. I saw PowerAutomate suggested elsewhere online, but as you implied, it might have taken me longer to make one than to just write it in C#, and no matter how I wrote it, it would keep getting put off. By comparison, I got this working in about 15 minutes!
Thanks again,
Travis
Thank you. Your PowerAutomate algorithm has been very helpful. One issue that I encountered is that self-created calendar events with no attendees do not sync between the calendars. Perhaps because these calendar events do not have a designated “ResponseType”? Please let me know if this is the case and if there is a solution to the issue.
Events you create for yourself do have a response type, called “organizer”, and should be synchronized by default (as long as you have configured “organizer” to be part of the list in the settings block titled “Setting: create SyncBlocker events only for these event responses”). You will need to debug the flow runs yourself to try to find the problem, I’m afraid.
I had the same issue, I checked the responsetype of an event which was not synced and created by myself. The response type was “none”.
After adding “none” it works.
well done!!! thanks very much 🙂
Marius, you’re a hero. I can’t believe how something so trivial was so hard to achieve. I’ve tried quite a few other suggestions found online but none are as fully functional as yours. Thanks a lot!
A few tweaks which I did which also solve an issue mentioned above:
– Added ResponseType: “none” to the list of events to sync. That way events without recipients are also synced (Calvin’s issue above).
– Added Sensitivity to be synced as well. I would say this makes sense as if it’s private in one calendar it should remain that way across all calendars.
By the way, completely agree on the Flow/low-code experience. It’s a disaster to work with..
Hi Niall, glad to hear that. Thanks for the hint regarding the “none” ResponseType.
I just released an update (v0.5) that has better stability, and also includes your suggestion to synchronize the sensitivity field.
For many years I used a VBA solution (based on https://www.slipstick.com/developer/copy-new-appointments-to-another-calendar-using-vba/) to sync my private appointments to a private calendar whilst still keeping them visible in my main outlook calendar.
Moving to O365 I stumbled across your solution – and I will immediately stop trying to get my head around the event-based flows 🙂 (I always thought my VBA was slow, but then I started tinkering around with Power Automate…)
For my personal use case syncing the original location and categories would be nice (in fact I’d like to sync as much as possible of the cal1 event). For the location I would try to wrap the ID in square brackets and store it somewhere in the body, hoping that will not slow down the filter too much – we’ll see…..
Thank you so much for sharing this! This is the only solution I found that works perfectly for me.
Just wanted to come here and say: Fantastic Tool. Have used the commercial tools but many of my clients require SarbOx compliance reports to allow the tool to run on their AAD accounts and neither calendarbridge or syncpenquin have the compliance documents to date.
This tool is currently running along side my calendarbridge (my ms outlook to my corp email) and this tool is now running a few clients to my corp email. works great!
Hey Marius,
thank you very much for the flow. So far it looks like it could save us the work and efforts of using two calendars in different companies simultaneously.
I just wanted to share that we have experienced some major problems with it recently when testing it for the first time with a 90 days sync. The first runtime was successfully and synced all calendar items, but the second one was fatal and deleted all existing calendar entries in both calendars for the next 90 days – both synced and original appointments. It looks like the flow recognized them all as an “orphaned SB event” and deleted them.
I am currently trying to figure out where the error comes from and what caused the issue. If you have any hints or ideas on the matter, please let me know.
Hi Anna, I’m sorry to hear that you had data loss. I’ve not had this happen to me yet.
In case you can find the flow execution that did all this (look for executions that have a significantly longer execution time than the others, since the deletion would take time): check whether the events in sbcal1 and sbcal2 are actually correct (i.e. only contain events that start with “SyncBlocker: …”. If they are correct, then there might be a problem with the value of their “location” field – it should be a different event-uid (=”unique id”) for every entry in sbcal1/sbcal2 – if not, then something already went wrong during the creation of the SB events.
Thank you for this, has massively saved my time manually copying over everything in my boss’ two calendars!
It has recently been coming up with an error though, I can only see one event that wasn’t being copied across and it was one added in by someone else as a reminder, with no location or attendees. The error is below, would appreciate your help in correcting/understanding!:
InvalidTemplate. The execution of template action ‘Cal1_SB_events_with_matching_location’ failed: The evaluation of ‘query’ action ‘where’ expression ‘@equals(item()?[‘location’], items(‘realcal2_event_loop’)[‘iCalUId’])’ failed: ‘The template language expression ‘equals(item()?[‘location’], items(‘realcal2_event_loop’)[‘iCalUId’])’ cannot be evaluated because property ‘iCalUId’ doesn’t exist, available properties are ‘subject, start, end, startWithTimeZone, endWithTimeZone, isHtml, responseType, responseTime, id, createdDateTime, lastModifiedDateTime, organizer, timeZone, categories, webLink, requiredAttendees, optionalAttendees, resourceAttendees, location, importance, isAllDay, recurrence, reminderMinutesBeforeStart, isReminderOn, showAs, responseRequested, sensitivity, body’. Please see https://aka.ms/logicexpressions for usage details.’.
Hey Georgia, thank you for reporting this. It seems that special kinds of Outlook events are missing the
iCalUIdproperty, for some reason.You could try the following to fix it: in the “realcal2 event loop block” there is a purple “Cal1 SB events with matching location” block that filters the array. In that block, click on “Edit in advanced mode” and replace “
@equals(item()?['location'], items('realcal2_event_loop')['iCalUId'])” with “@equals(item()?['location'], items('realcal2_event_loop')?['iCalUId'])“. All I did is to add a question mark that should avoid that the expression of this block crashes.I created a new version 0.6 which should address your issue.
I love your work on this.
What I’ve done with the flow is move the CalID into the body, and copy over the location.
I use it to sync an .ics internet calendar into my personal calendar, so I removed the two-way-sync by deleting the Cal2 creation bits, since cal2 is my internet calendar which is read only.
I tried with event-based sync for this, but it synced about 20 events per event 😀
Peter, could you share the code where you have changed the CalID to the body instead of using the location?
Marius, thank you so much for sharing your flow. Trying to sync my work events (Outlook 365) to my personal calendar (Outlook.com) so I can see them in my phone’s Outlook calendar widget was driving me crazy. It took me all day, but I figured out the changes I need to make to your flow for a one-way Outlook 365-to-Outlook.com sync. Since it’s just a one-way sync, I know both calendar names, and I just delete the existing synced events in my Outlook.com calendar, I simplified the flow considerably.
What’s got me stumped now is figuring out where the event response type fits. I only need to see work meetings on my phone, not time-blocking appointments I create for myself. I can’t figure out how to filter my Outlook 365 events by response type before they’re synced to my personal calendar. I know you’re not a one-man support team for your flow, but I’d really appreciate any pointers you (or anyone else here) can offer. It’s not hugely important, because the sync *is* working. I’d just rather not clutter up my phone’s calendar widget with work events I don’t really need to see. 🙂
Hey, I’ve released a new version 0.8 which both supports uni-directional synchronization, and can be configured to skip synchronizing events that you created just for yourself (events that have no other attendees).
How did you manage to get Outlook.com connection to work? I cannot see it in the list of available options when setting up the flow, even though the connection is active. In other words, I only see my work calendar connection when doing the ‘import setup’ step after uploading the zip file. Thanks.
No idea why your other calendar wouldn’t show up, sorry.
I know why – because both calendars in the flow are Office365 calendars, but the one I need to use as my second calendar is Outlook.com calendar (even though I pay for Office365, it is not an organisation/school account, but a personal account, hence it does not recognise that account under Office365, just under Outlook.com). I have changed that in the flow, but then faced other issues, so I cannot make it work it seems. 🙁
Hey Marius,
Thank you for this. I think this is exactly what I’ve been looking for!
One quick question: for the conditional checks of “Check event count cal1” and “check event count cal2”, you check if length.cal1 is equal to eventCountMax. and same for cal2. Should this be greater than (or greater than/equal to)?
It’s very possible I’m missing something though. I’m still getting used to Power Automate.
Thank you again for this. I can see this took a lot of time and trial/error 🙂
Glad that the flow is useful to you. The comparison-check you’re mentioning should indeed be “equal”, not “greater than”, because I’m also setting the upper limit of the API results in the “Get calendar view of events cal1/2” block. Thus, if there are too many events in the desired daysToSync time period, the API would return eventCountMax events.
hello marius,
is really a great tool. I’ve been looking for it for a long time.
Unfortunately, I have a small problem.
I have duplicate calendar folders with the same name “Calendar” in one calendar. That’s why the synchronization doesn’t work. Is there a way to add the field “changekey” to make it more unique? Or is there another way?
Hi, one easy solution would be to just rename one of your calendars in Outlook.
I’m not sure what the “changekey” field is that you are referring to, or where it should be configured.
…renaming has helped. Thank you!
Thank you so much for taking the time to explain and develop this flow so well. It provides a huge help since I have exactly this situation where I work with 2 calendars and I need them to be updated and block my time accordingly.
Just a question on recurrence. I noticed that the flow currently copies a series of events as if they were single instances. Is there a way to customize this so that recurrence is mirrored as well in the SyncBlocker event? Would this allow for less “processing” power on account of the flow?
Thanks again!
Hi, glad to hear that the flow is helping you.
I had the same thought as you, but it’s technically not possible to create recurring calendar events with the Power Automate blocks for Outlook.
Thank you, Marius. This is still gold. I’m finding myself opening the calendar just to see it synched. It gives me a level of satisfaction, not many things have so far this year. I was in a dead end with the infinite loops. Thank you for solving it and for sharing it.
Just a quick note that I can’t make the feature work to duplicate events that don’t have attendees. I’m not sure why, and I’m a bit coding illiterate to properly show you. In any case, I’m just noting down a “dummy” attendee and saving without sending, which does the trick.
THANK YOU SO MUCH AGAIN
All best thoughts to you shared from Buenos Aires, Argentina. This is how far your wit has reached 🙂
Hi Marius,
I want to thank you a lot for the flow – I can finally sync my calendars and not miss anything that’s on different account.
I have a question for specific case: I created two instances of the workflow, as I need to sync 3 calendars.
I have one “master” calendar (1) and two “additionals” (2 and 3). The sync process works very well between 1 and 2 and between 1 and 3. However, the syncblocker events source from cal 2 to 1 do not get then recreated in cal 3 (nor events from cal 3 get recreated in cal 2).
How can I achieve the sync also between cals 2 and 3? Should I create third flow? Or maybe there is an option to change something in the flow that syncblocker events may get propagated further? Probably there’s a filter somewhere that don’t let them be taken into consideration, but I cannot solve it myself. Thanks!
Hey, I never tried the 3-calendar-sync myself, so there is a chance that there is a problem that I’m simply not aware of. What prefixes did you choose for the SyncBlocker events? They should be different, and also not be prefixes for each other. For instance, a working example would be “SB1: ” for your first synchronization-flow, and “SB2: ” for your second flow, a bad example would be “Sync” and “SyncBlocker”.
In theory, an event titled “abc” (in calendar 2) should be synchronized from calendar 2 to 3, because flow A (that synchronizes calendars 1 and 2) should create an event “SB1: abc” in calendar 1, and flow B (synchronizing calendars 1 and 3) should treat “SB1: abc” as an ordinary event (as if you had created it in calendar 1 yourself) and thus create an syncblocker event “SB2: SB1: abc” in calendar 3.
In case you accidentally chose the same prefix for both flows, make sure that you follow this sequence:
– In Power Automate, deactivate both flows A and B
– Clear all SyncBlocker events, either deleting them manually in Outlook, or by importing and using the “Delete SyncBlocker events” flow, which you can find in the GitHub repo
– Change the prefixes in your flows A and B, save the changes, then activate the flows A and B again
Hi Marius, thanks for your response.
I should have added that I picked different prefixes for both flows. I had the same theory of how the prefix would look in 3-way synchronisation, but apparently it doesn’t.
I have an idea though – maybe events created by the flow are not propagated further because on the filter on the response? What is the response type that is by default assigned to copied event? I have filter on these ones at the moment:
[
“organizer”,
“accepted”,
“tentativelyAccepted”,
“notResponded”,
“none”
]
Thanks,
Ignacy
Hi. The responseType of SyncBlocker events should be “organizer” (at least that’s the case for me), so that should not be the problem. No idea what’s going wrong. I might try setting up such a three-way sync myself to verify it this weekend.
I tested it, but it works just fine, see screenshot: https://paste.pics/QCDY5
No idea why it won’t work for you.
Please note that I do not have access to three different Outlook 365 accounts, so tested it with a single account in which I created two additional custom calendars.
Hi Marius,
Sorry for the late-late reply.
I think I just did something wrong with initial configuration, but I can confirm that sync of 3 calendars (1 primary and 2 secondary ones) works totally fine.
I’m really thankful for your solution!
Ignacy, what configuration setting did you correct?
I have three accounts: main, sub1, sub2. Main to subx works great, but an event created in sub1 and synced to main is removed from main when the sub2 flow runs.
This leaves only the original event in the original sub1 calendar.
This looks like you are either using v0.9 of the Power Automate flow (which no longer supports synchronizing multiple calendars, I just realized), or you are using v0.8 (or older) and configured the same SyncBlocker prefix in every flow (but it needs to be a different prefix in each flow).
I can’t reply directly to Marius but that’s exactly what it was – I was using v0.9 which, at this time, does not support 3+ calendars.
Switching back to v0.8 resolved my issue and I’m able to sync 5 calendars.
Thank you for your quick response!
Hello Marius,
First of all, Thank you for creating such a wonderful flow.
I have a question: I have one shared calendar which I would like to synch with other few (approx 50 members) calendars. Like, if I change any event on the members’ side, it should reflect in the shared calendar and if there are any changes in the Shared calendar then it should reflect on the members’ side.
Could you please help in this case?
I’m afraid not. I don’t think it can be done in a sensible way with one PowerAutomate account anyway, because of the action limits per day.
Hey Marius,
This has been super helpful, thank you so much for putting it together. Power Automate recently got rid of the option to import legacy flows do you have any plans to update this to allow for importing it as a solution (dataverse)?
Hi Don, glad to hear that the flow helps you. The “import package (legacy)” function still works for me. You might not have the correct plan.
I was unable to figure out (from the Microsoft docs) how to share a flow publicly. If you know how, please let me know here. I do not want to give owner permissions to anyone else, so from what I understand, all I can do is to send a copy to individual people, which would be a huge hassle, as every new user would have to tell me their email address…
Hi Marius,
really great stuff you created… Many many thx for sharing this… But as often: I am stuck with the import of the flow… During the upload of the zip a red banner pops up with the very meaningful error message “Something went wrong. Please try again later”. Thx Microsoft! Also “later” the error message still appears. Any idea what could go wrong?
Thx again, and have a great day…
Lutz
Guys, disregard… The downloaded ZIP was broken… I downloaded again and everything is ok… Thx again, Marius… L.
A small contribution – I am using the flow to sync O365 to google. Google event description has a limit of 8k characters. Unfortunately this also counts any html tags/etc. There are a lot of these much more than text. I found that many of the o365 events where cutoff and was missing a good chunk for this reason.
I inserted a htmltotext block for the body and voila
Note url still will show as urls and clickable
Thanks for reporting this issue. May I ask how you told the “HTML to text” action to use the output of a previous action as input? To me, it seems that “HTML to text” only supports static input strings.
Yes that is what it looks like but you can insert just like any other function -can’t paste a picture here but it works
-Find realcal1 event loop
-Insert Html to text in between Set SB-cal2 subject and Set SB-cal2 body
-Copy the current input value on Set SB-cal2 body (if(..))
-Paste inside Html to text (there is only one field where you can paste called content)
-Change Set SB-cal2 body value to the output of html to text
I am not sure why there is lots and lots of html tags even for little text and it was not rendering well on google calendar so this works well even if there is no data
Unrelated – something else I modified was introduce a condition to only copy if there is some matching words on the invite subject – this was useful for my use case. Understood most people don’t need this
Hey Marius,
While I have not gotten this to save yet due to calendar name issues, I can see it is likely going to be a HUGE time saver, thank you for doing this.
The issue I am having is that even though the names of my mailboxes are appearing in the output of the “Get calendars of Outlooks account 1 (and 2) list, I get a “Flow save failed with code ‘InvalidVariableOperation’ and message ‘The inputs of workflow run action ‘Find_correct_cal1_calendar’ of type ‘Query’ are not valid. The variable ‘nameCalendar1’ must be initialized before it can be used inside action ‘Find_correct_cal1_calendar’.’
Hi Chuck. I’ve never seen that error. It indicates that you accidentally deleted or moved some of the action-blocks, without having noticed it. I recommend you delete the flow and re-import it from the zip archive and try again.
Thanks Marius, I’ll do that and let you know how that goes. I’m amazed that you are so responsive, I don’t get answers this quick form companies I pay money to for support.
Wow, got this working and what a beautiful piece of work. If you ever find yourself in Pittsburgh, PA in the US, I owe you a beer!
Glad to hear it 🙂
You did a fantastic job, I was struggling to find a solution that worked with all the different variables. How can I sync the location across calendars instead of the long hexadecimal string? I am using v0.8
Hi Shane, thanks. Take a close look at the README of https://github.com/MShekow/outlook-calendar-sync where it mentions that synchronizing the location is not possible in v0.8 (or older), it requires setting it to that long hexadecimal string. Consider using v0.9 instead, assuming that you only want to synchronize two calendars.
Hi Marius,
super Arbeit und vorallem auch dein Fork für Google Calender
https://github.com/MShekow/outlook-google-calendar-sync
Hat wunderbar geklappt, wie hier in einem anderen Kommentar musste ich auch die “Check event count cal1” und cal2 anpassen anstelle von equal zu greater than or equal to und schon lief es rund.
Vielen Dank dafür!
Hello! I love this tool and I’ve been sharing it with people in my team 🙂
Is there a simple way to change the dummy name/description to something other than ‘Blocker’? I’ve had a few people request I change it to ‘Busy’ which is a bit more standard.
No worries though, the main functions are 10/10, thanks again!
Hi Paul, glad to hear that the tools works for you and your team.
What you are describing is a feature request I’ll implement at some point. Until then, you can do it yourself. In the block “Set SB-cal2 subject”, change the value from
if(variables('hideDetailsInCal2'), concat(variables('syncBlockerEventName'),'Blocker'), concat(variables('syncBlockerEventName'),items('realcal1_event_loop')['subject']))to
if(variables('hideDetailsInCal2'), concat(variables('syncBlockerEventName'),'WHATEVER-YOU-WANT'), concat(variables('syncBlockerEventName'),items('realcal1_event_loop')['subject']))Similar, for the block “Set SB-cal1 subject”, change the value from
if(variables('hideDetailsInCal1'), concat(variables('syncBlockerEventName'),'Blocker'), concat(variables('syncBlockerEventName'),items('realcal2_event_loop')['subject']))to
if(variables('hideDetailsInCal1'), concat(variables('syncBlockerEventName'),'WHATEVER-YOU-WANT'), concat(variables('syncBlockerEventName'),items('realcal2_event_loop')['subject']))Best regards,
Marius
Hey, thanks so much for this! Definitely helps me accelerate things.
I do have a feature request/assist.
Unfortunately one of my M365 accounts is restricted and as such I can’t login to both accounts in the same instance of Power Automate. What I’d like to do is create both Calendars in the same account (that part’s working fine) but then add my other account as an “attendee” to the Blocked calendar invite, I’ll then create a separate Power Automate function on the other account to process those invites. Could you point me to where in the flow I’d need to go to add an attendee to the Blocked events? I tried setting it as a separate flow but it’s wiping out your “attendee” settings that you use for syncing.
Thanks! I’ll keep digging into it to see if I can find it myself as well.
Hi James, you need to manually go through the entire flow and take a closer look at the blue-ish actions/blocks whose title starts with “Create event” or “Update event” (there are 2 blocks of each).
I have a situation which I am unsure of and hope that you could chime in on if you think power automate can solve the problem. Basically 2 organizations share a building. There is one pro teams license tied to my organization that allow more features. Since organization 2 is the primary building owner they want the external email to stay the same. The idea was to create an email account and set a forwarding rule in teams so that both calendars will show events, but this is not working. It works with both email accounts within the same organization. I have exhausted all guides or getting the calendar to sync.
What I would like see happen is that someone from org2 can email org1 mail and then have power automate sync that calendar to org2.
Do you think that is possible? Both org1 and org2 are external domains.
Hey, no idea, sorry.