OAuth 2.0 and OpenID Connect 1.0 solve user authorization and authentication. In this article, I discuss the advantages and the authorization and authentication flows of both protocols, based on a video presentation by Nate Barbettini.
Introduction
If you develop an application, e.g. a mobile or web app, common problems are user authentication and authorization. The former identifies a user (and is sometimes also called SSO or Single-Sign-On), the latter specifies the permissions the user has within your app.
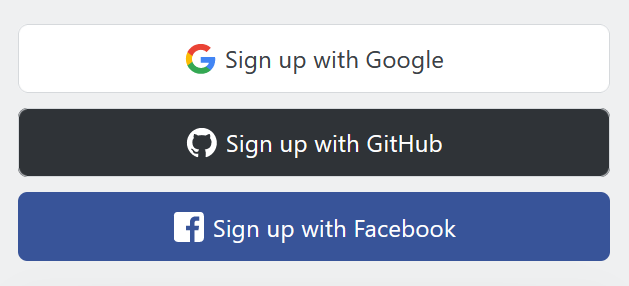
In the recent years, the protocols called OAuth 2.0 and OpenID Connect 1.0 (OIDC) have become extremely popular and wide-spread, solving both problems. Hundreds of providers have emerged, including Google, Microsoft, Facebook, Twitter, etc. This lets you offer “Sign in with <provider>” buttons, as shown in the image below:
This has a number of advantages:
- You no longer need to force a registration form upon your users. The user only has to click on “Sign in with …”, then click another “Authorize app X to access my profile information” button (on the provider’s page). This is much faster and more convenient, compared to having to complete an entire registration process.
- Users no longer need to remember their email & password combination they used for your service. They only need to remember which authentication provider they used, to sign up in your app (and only if you offered signing in with multiple providers).
- Your app (database) no longer needs to store user passwords, which reduces the security risk in case of a breach.
To integrate OAuth and OIDC into your app, you first need a thorough understanding of the protocols. While there are a lot of (sometimes contradicting) articles on the Internet, I recommend that you take an hour of your time and watch this YouTube video instead. The presenter, Nate Barbettini, explains the concepts exceptionally well, starting from a high-level (less technical) overview of the authorization flow (as seen from the user’s and app backend’s perspective), down to a very technical low-level perspective.
The remainder of this article is my summary of notes, which saves me (and you) from having to watch Nate’s video a second time, in case you forgot some of the details.
OAuth 2
Introduction
The use case OAuth was originally invented for is delegated authorization. As an example, suppose the (web) app you develop (called myapp) needs access to resources managed by a third party service (e.g. Google). For instance, the resource type could be your phone contacts stored in your Google account. Without OAuth, there wouldn’t be a good, standardized approach to give myapp only access to your contacts, while denying access to all other resources the third party provider stores for you (e.g. your emails or calendars). With OAuth, the third party service defines many different, fine-grained permissions (called scopes in OAuth-speak). In an authorization flow (explained below), myapp requests only those permissions it needs, and myapp never needs to know the user’s password for the third party service.
Today, many applications just need authentication, not authorization. OAuth, which was built for fine-grained authorization, is “abused” to do authentication. Your app requests from the third party service only the type of resource that identifies you, e.g. your GMail email address, or the user ID that is unique within that third party service. Because the names of the resources (scopes) for identification were not standardized in OAuth, OpenID Connect (OIDC) was invented. It is a thin layer on top of OAuth that standardizes these resources (more details below).
OAuth terminology
- Resource owner: the user who does the login and grant-permission clicks – they own the resources (e.g. contacts in your Google accounts)
- Client: the application you develop (
myapp) that wants to use delegated authorization, or authentication - Authorization server: the web UI part (and REST API) of the third party service (e.g. accounts.google.com)
- Regarding web UI: here the resource owner clicks to provide authorization to the requesting client
- Regarding REST API: the client provides authorization grant data (e.g. an authorization code) to the authorization server API and gets an access token from it in return.
- Resource server: the API or system that actually holds the data the clients wants to use (e.g. the Google contacts API)
- Sometimes Authorization server and Resource server are the same system, sometimes not.
- Authorization grant: a token that proves that the user gave authorization on the authorization server
- Redirect URI / callback: URL to which the Authorization server should redirect the resource owner‘s browser to, after they clicked “authorize”
- Access token: the client uses it to retrieve resources from the resource server.
- Authorization grant type: OAuth supports different types, most notably:
- Authorization Code (using front & back channel –
response_type=code), which is typically used for applications that have a backend and a mobile or web frontend. - Implicit (uses only the front channel,
response_type=token): this is e.g. useful for a SPA (for which you didn’t implement a backend). Here the flow skips the authorization grant phase, and immediately returns the access token.- Since everything happens on the front channel, this auth flow is a bit less secure than the code grant type.
- There are other grant types, but they are only meant for special use cases and are rarely used.
- Authorization Code (using front & back channel –
- Scope: a simple string that defines a (possibly fine-grained) permission to some piece of data (e.g.
contacts.read,contacts.write) which the authorization server understands. Each third party service can define its own scope strings. The client will only ask for a (sub) set of these scopes. The requested scopes are reflected in the consent screen shown to the user during the authorization flow. - Back channel: a highly-secure communication channel, usually between client and authorization server
- Front channel: e.g. a connection between the resource owner‘s browser and other servers (like your app, or the authorization server). Browsers are considered to have limited trustworthiness, e.g. because any kind of malicious browser extension could sniff data.
Basic authorization flow
The following image illustrates the authorization flow for grant type = code. Click on the image to enlarge it.

The flow follows these numbered steps:
- In your app’s UI, the resource owner clicks on “Login with Google (etc.)”
- Your app redirects the resource owner‘s browser to the authorization server‘s URI, with extra information (as GET query string) like:
- Instructions regarding what the authorization server what it should do once granting was successful: e.g. the Redirect URI, or grant type (
response_type) - The requested scopes (strings separated by
<space>) - The Client ID
- (Optional) A nonce string, used to prevent replay attacks
- (Optional) State: a value the authorization server will give back to your client in step 4 below, e.g. a HTTP URL the resource owner’s browser should go to once the auth flow has completed. Could also be an anti-forgery token that is verified once the auth flow is complete.
- Response mode (optional), which defines how the result of the authorization request is formatted. See here for more details.
- Instructions regarding what the authorization server what it should do once granting was successful: e.g. the Redirect URI, or grant type (
- In the browser, the authorization server may show the login form to the resource owner first (if they still need to log in). Next, the grant dialog is shown asking the resource owner whether they want to grant your app’s client access to the requested scopes.
- Resource owner clicks “grant”. Next, the authorization server redirects the resource owner to the Redirect URI (as provided in step 2), appending the authorization grant (e.g. the “code” if the grant type was set to “code”) and other data provided in step 2 (like State or nonce), as query string.
- Given the authorization grant (e.g. the code), while the resource owner sees a “please wait” page, in the background the client requests an access token from the authorization server, providing it with the authorization grant (e.g. the code), the client ID and the client secret.
- Still happening in the background process, the client calls the resource server with the access token and retrieve the necessary data (e.g. your Google contacts). The access token is typically provided as HTTP header, e.g.
Authorization: Bearer <access token> - Once the client has retrieved all necessary information in the background, it redirects the resource owner to the main application page.
Front vs. back channel
Steps 1 – 4 are using the front channel (involving the browser, with data being exchanged as GET query strings). Steps 5+6 are using the back channel – the resource owner’s browser does not know what is happening. Step 7 involves the front channel again.
Preparation steps
As an application developer, you need to do perform a few preparation steps before you can make use of OAuth 2.0 authorization (or OIDC authentication):
- You need to select one (or more) OAuth providers (especially if you want to use them only for authentication) and study their available scopes.
- Register with the authorization server of the OAuth 2.0 provider and generate a client ID and a client secret specifically for your application. The client secret is only used in steps 5+6 above, during the trusted back channel communication.
OpenID Connect 1.0 (OIDC)
OpenID vs. OpenID Connect
OpenID 2.0 is deprecated, use OpenID Connect 1.0 instead, which is the successor of Open ID 2.0.
As you can see, the OpenID folks have similar “talents” when it comes to naming and versioning as most phone manufacturers…
OIDC is a thin layer on top of OAuth that standardizes a scope (openid) and changes a few details of the OAuth authorization flow, to turn it into an authentication flow.
OIDC adds a bunch of terminology, including the definition of synonyms, most notably:
- OpenID Provider (OP) = authorization server (in OAuth-speak)
- Relaying Party (RP) = client (in OAuth-speak)
OIDC adds the following new concepts:
- ID token: a data structure (dictionary) describing the user (reference), encoded as JWT.
- UserInfo HTTP endpoint: all OIDC-compliant auth servers need to implement it – the client can (optionally) call it (providing the access token) to retrieve additional information about the user, in case the information contained in the ID token is insufficient.
- Standard set of scopes and OIDC reference implementations.
Auth flow differences
OIDC makes use of the basic OAuth auth flow, and just makes a few minor modifications. If grant type = code, the modifications are:
- In step 2, the client specifies the
“openid”scope string, which is standardized by OIDC. - In step 5, the client also receives the ID token (in addition to the access token) in exchange for the authorization grant. In a subsequent request to the UserInfo endpoint, the client can retrieve additional user information, if needed.
Further resources
If you want to dig deeper in the material, I recommend the following resources:
- OAuth 2.0:
- The official specification is too complex to grasp. Instead, take a look at oauth.com or the guide by auth0, which both do a good job of simplifying it.
- oauthdebugger.com helps you debug exchanged messages during an OAuth flow.
- OpenID Connect:
- The official specifications (notably the Core specification) are very readable.
- oidcdebugger.com can be used to debug exchanged messages.
Finally, you should usually not attempt to implement the authentication/authorization flow yourself. Most of the time, someone already dedicated a library that solves the problem, and ensures that all steps are done correctly – including (cryptographic) verification of the exchanged data.
Further excellent resources:
https://www.romaglushko.com/blog/whats-aouth2/
https://stack-auth.com/blog/oauth-from-first-principles
https://www.youtube.com/@saschazegerman/playlists