With Windows 10 it is no longer strictly necessary to install antivirus or firewall products by third party vendors. While this used to be good practice for Windows 7 and earlier, Windows 10 already contains malware protection and a firewall that provides sufficient protection. Avoiding third party products saves you money and avoids that your system is slowed down (due to bloated security suites), or otherwise negatively affected by these products. This article explains the reasons in detail and provides tips for how to get the maximum out of the Windows firewall with a small tool.
Introduction
Until a few years ago, whenever I set up my own Windows-based machines, I used to install a software firewall and some antivirus application. Sometimes this had to be done even before connecting the machine to the Internet, to avoid immediate infection. Things have changed quite a bit since then, even though all these products still exist. Viruses are no longer all the rage. Nowadays people are targeted by malware, which is a generic term that includes viruses, worms, trojan horses, adware, bots, ransomware, miners, potentially unwanted applications (PUA) and many more. Most commonly, you can infected via email, browsing, or opening bad files from USB or network drives. This is why third party vendors such as Kaspersky, Comodo, Avira, Symantec, McAfee and many others offer “Internet Security suites” to protect you from these threats. Sometimes they include a separate firewall, sometimes they just constantly monitor your system for malware. As I’ll discuss shortly, you typically don’t need these tools anymore. However, the marketing machinery of the security software industry is still going strong. They promote their products with terms incomprehensible for the layman, triggering your primal instincts of fear. You’ll find crafty product placements hidden in “informative” articles of digital or print computer magazines that run ridiculous comparison tests that tell you how many percent of a selected set of threats were detected by each vendor. Rest assured that there is money involved behind the scenes.
Reasons for avoiding third party products
In general, there are many problems with anti-malware and firewall products of third party vendors:
There are also a few problems specific to firewalls:
How to choose your anti-malware solution
Since recent versions of Windows 10, the integrated anti-malware component, named Windows Defender, has become an appropriate alternative. Using Windows Defender has these advantages:
As for the last point, I recommend that you do an Internet search for Windows Defender’s detection rate at the time you read this article. Many articles with the same sentiment as this article (e.g. this one) will suggest that you run the Desktop product from Malwarebytes alongside Windows Defender. It will detect even more malware, and is updated faster. Just keep in mind that any source may be biased. You’ll have no way of knowing whether these articles are essentially just product-placement. Note that Malwarebytes also has a free version, which is limited to on-demand scanning (without real-time protection).
In general, if you really want extra protection, definitely use a paid product, to avoid that the vendor is motivated to fund itself by collecting and selling your data (see here). You may be able to save a few bucks by looking (or waiting) for special deals or coupon codes. I’ve also purchased concessional (but legit!) licenses not directly from the third party vendor, but from (computer) online stores. Just check whether the stores (those you already know and trust when buying hard- and software) have a security software license section.
To conclude, I’m fine with the basic level of protection Windows Defender provides. If I don’t trust specific files I want to open, I’ll just have them scanned by the free version of Malwarebytes, on-demand. In general, the best anti-malware software is your mind. Think, before you click. Treat anti-malware tools like a safety net, not like a comprehensive, all-inclusive caretaker.
Firewall considerations
Windows integrated firewall basics
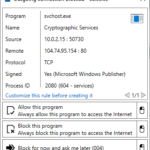
Since Windows 7, the integrated Windows firewall is doing a fine job, with minimal impact on system performance. Its default configuration is to allow all outgoing connections, and block all incoming ones. Regarding incoming connections, several pre-installed rules created by Microsoft are in place (e.g. to allow Files and printer sharing), and you can explicitly create rules as well. Typically this is done with a simple click you do in a pop up window that automatically opens whenever a new applications asks Windows to be allowed to accept incoming connections (see below).

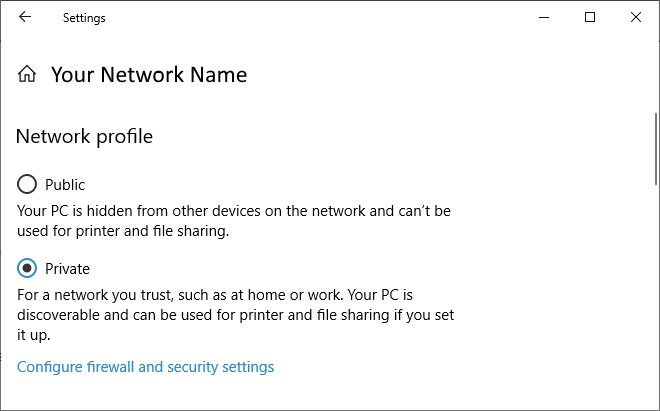
The Windows firewall has three profiles, “domain profile” (for work), “private profile” (e.g. home WiFi) and “public profile” (e.g. airport WiFi). Each physical (and virtual) network connection you establish is assigned to one of these profiles. That is, every WiFi spot can be assigned to a different profile. The configured firewall rules apply to one or more profiles, and typically have sensible defaults. To be properly protected, it is important that you assign connections to the appropriate profile. For instance, if you connect to a public WiFi, e.g. of the airport or a coffee place (or any other network you don’t fully trust), make sure to assign it to the public profile. The firewall rules are more restrictive, protecting your mobile device from being accessed by other devices on the same network. The assignment happens whenever you connect to a network you’ve never connected to before, but the assignment can also be changed retroactively. Just click on the network icon in your task bar (next to the clock) and click on Properties of the connection. A window as the one below then opens.

The wrong reason to use a third party firewall
When I installed third party firewalls back in the day, the main reason was to have more control over outgoing connections. The idea was (and still is) to block them all by default, and only allow selected ones. This limits apps that try to “phone home” (euphemistically called “send telemetry data” by Microsoft and other companies). It also helps to identify malware that slipped through the cracks of your chosen anti-malware and attempts to send data, e.g. to a control server.
However, paying for a third party firewall is not necessary. You’ll be subjected to all the downsides I listed in Reasons section above, with no real benefit. If the only reason you need one is the ability to block outgoing connections, you’re in luck: the Windows firewall can block outgoing connections selectively. However, because its user interface clunky and hard to use, I recommend to use a third party configuration utility, presented next. These tools only configure the rules, they are not a firewall by themselves.
Configure and tweak the Windows firewall
Below I’ll present three alternative configuration utilities that help tweak and configure the Windows firewall.
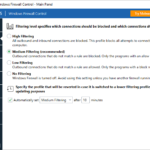
Binisoft WFC is my recommended firewall configuration tool. Since the author joined the aforementioned Malwarebytes company, all paid-for variants of WFC have become free, such that there is now only a free edition. When using the “Medium filtering” profile, all outgoing connections for which no explicit rule exists yet are blocked. Binisoft WFC can be configured to show a pop up window whenever an application attempts to access the Internet. That window offers to either grant full access, or to customize aspects like protocol or ports. You can also grant temporary rules, which is very handy for installers or similar programs to which you don’t want to grant permanent Internet access. An alternative approach is to switch to WFC’s “Low filtering” profile (where outgoing connections are allowed). In the WFC configuration you can set a timer to return back to a profile of your choice (like “Medium filtering”) after a configurable amount of time, e.g. 10 minutes. This makes sure that you won’t forget to raise your protection level after a manual switch to a less restrictive profile. For any rule you can set to which Windows firewall profiles (private, domain, public) it applies.
For those of you who do not like pop up dialogs, there is a connections log view that lists blocked (and granted) connection attempts. This allows you to quickly create new rules from these entries. The rules window also provides filters to clean up invalid rules (for programs that no longer exist) as well as duplicated rules, which reduces clutter.
Sphinxsoft Windows Firewall Control has a free and several paid-for editions with various features. The free edition includes only the most basic functionality. Like with Binisoft’s WFC, it triggers a “create rule” pop up window whenever an application attempts to access the Internet, and it allows you to inspect past connection attempts in a separate “events” view, from which you can quickly create rules. However, the controls over the rules in the free edition are very limited. You can either complete block or allow the connection, or set a specific direction (only incoming vs. only outgoing). No further options (such as limit to specific IPs, ports or protocols) are available. The paid versions add several more options, including a particularly useful feature which other tools lack: the ability to activate an “expensive/insecure connection” mode. You enable this mode temporarily, whenever you’re using such a connection and want to avoid certain applications to produce any traffic. An example situation would be the use of your phone’s WiFi hot spot with a limited data plan. For any rule you create, you can set an extra check box to block traffic while being in that expensive connection mode.
That being said, there are a few caveats. For one, the UI looks very technical and antiquated, as seen on the screen shots below. Also, the fact that Sphinxsoft’s home page presents WFC over an unsecured HTTP webpage (as of early 2020), and has a blog with a single post from 2012, is somewhat leaving a bitter taste and reduces trust. At least the purchasing website is secured via SSL.
TinyWall is a free tool whose versions 1.x and 2.x control the Windows firewall. Note that version 3.0 is on the horizon, which will ship its own firewall engine and will no longer be based on the Windows firewall.
To cut things short, I generally do not recommend to use TinyWall (I tested version 2.1), for the following reasons:
- TinyWall does not provide a pop up window triggered by a connection attempt, by design. Instead, you have to manually specify the process (or select the window) of the application to which you want to grant Internet access. However, the authors of TinyWall forgot (?) to implement a connection log view. The consequence is that the usability is horrible, because there are many distributed applications that consist of several processes, e.g. a GUI and a background process. When the latter requires Internet access, it will be hard for you to identify it, due to the lack of a connections log view. I ran into this problem right away in my test installation. I granted an allow-rule for the Microsoft Edge browser, but Edge’s outgoing connections were still blocked. Later I found out, why: the process that really needs access is the Content process (microsoftedgecp.exe, not microsoftedge.exe).
- TinyWall comes with an autolearn feature can be temporarily enabled. It automatically creates allow-rules for every in/outgoing connection that occurs while the autolearn feature is on. This mode is useless, however. Since I don’t want to auto-grant access to every application, but only specific ones, this would mean that once I stopped the autolearn feature, I’d need a way to remove any allow-rules that were accidentally created by TinyWall. However, TinyWall doesn’t offer a “difference list” of the rules set, nor can rules be sorted by date. The view that lists all allow-rules (which is quite long) makes it practically impossible to identify which ones were added just now in the most recent autolearn session. You would have to go through the entire list, and might miss some unwanted entries, like annoying auto-updater services. These would then have Internet access from that point on.
Conclusion
Using Windows’ integrated firewall provides all the protection you need. As long as you assign the correct profile (public vs. private) to your connections, you will be protected even in public WiFis. At home your WiFi router will provide additional protection, as it also comes with an integrated firewall. Using Binisoft WFC you can control outgoing connections in any flexibility you need.
Summary
By using the integrated anti-malware and firewall of Windows Defender (in Windows 10) you will not only have a speedy system, but also save money, time and nerves. I’m not the only one who recommends this, see e.g. here, here or here. The firewall’s security can be improved by tools like WFC, which give you control over outgoing connections. If you don’t trust Windows’ anti-malware protection, you may still shell out some money to third party vendors. However, keep in mind that perfect protection is an illusion. Treat malware scanners like a safety net, not the first line of defense. Make backups regularly (as if you hadn’t heard that one before) and beat malware with your mind! Think before you click, and treat incoming files (even those you receive from friends or family) with suspicion.


