This article presents all necessary steps to get your macOS application into the hands of your users. I list and compare the four distribution and packaging options: the macOS app store, package managers like Homebrew, Disk images (dmg) files, and installers (pkg files). I also introduce the signing and notarization process.
Introduction
In my previous article, Distributing Windows applications, I introduced the core tasks a desktop application developer has to do, to get their application into the hands of their users. You first need to package the application, then distribute that package, and also find ways for auto-updating the application, or introducing a license key mechanism to limit the uncontrolled distribution and use.
Let’s now take a closer look at the macOS world, which works quite different to Windows. I’ll first go into the packaging and distribution alternatives, where I also discuss app auto-update options, if available. I’m not going into licensing in this article, because the available options do not differ from what I presented in the “Licensing your application” section of the Windows-specific article, so I recommend you take a look at it if you require licensing. Since macOS applications also need signing and notarization, this article also provides an introduction to these topics.
Packaging and distributing macOS applications
There are different ways your users can obtain and install your application. Let’s take a look at each approach, as well as its advantages and disadvantages.
1) App store
Every macOS user, even non-technical ones, know about the app store and how to use it.
Advantages:
Disadvantages:
If you cannot live with these disadvantages, the approaches presented below do not have these restrictions. You can release whenever you want, without following any guidelines. However, they are all less comfortable for the user and require you to provide a hosting and auto-update mechanism.
2) Package managers
There are several package managers available for macOS, most notably MacPorts and Homebrew.
Advantages:
Disadvantages:
3) Disk image
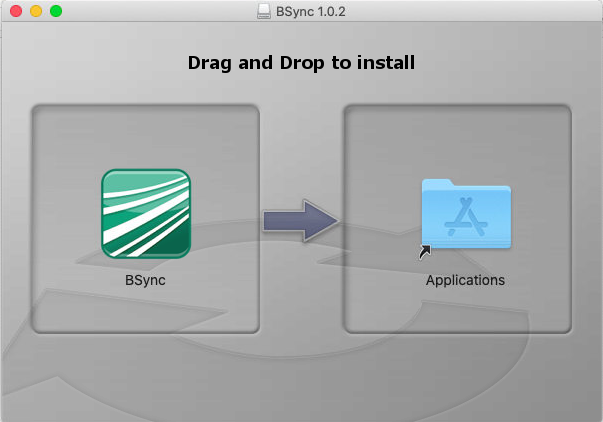
A disk image (.dmg) file is a compressed container that the user downloads from your website. It will mount as a virtual disk when the user opens it (double-click on the .dmg file in Finder, or using the Terminal command open yourimage.dmg). The virtual disk appears both on the user’s desktop and in Finder in the left panel, and its content will automatically pop up in a new Finder window. This disk image typically contains:
- Your application’s app bundle
- A symbolic link to the “Applications” folder
- A background image that indicates to the user that she should drag the app bundle icon to the “Applications” folder icon in order to install the application
- Optional additional files, e.g. a manual or a “clean uninstall” script
Alternative: installer (pkg file) in a disk image
Instead of placing the app bundle and the symbolic link to the “Applications” folder, you can alternatively put an Installer file into the disk image. Installers are presented in the next section.
A typical example of a disk image content (as shown by Finder) is shown below:
After the user “installed” the application (by moving the app bundle icon to the Applications folder), she has to eject (unmount) the virtual disk at some point again (explicitly), e.g. via right-click → Eject in Finder.
Advantages:
Disadvantages:
There are many tutorials that explain how to build such a virtual disk image. However, I found that the easiest approach is to spend a few bucks and use the software DropDMG. It offers a graphical editor to create a layout of the mounted image as shown by Finder, and allows to create an optional multi-language license agreement dialog. DropDMG can also sign the disk image, which is necessary for an application to work (see section Application signing below).
4) Installers
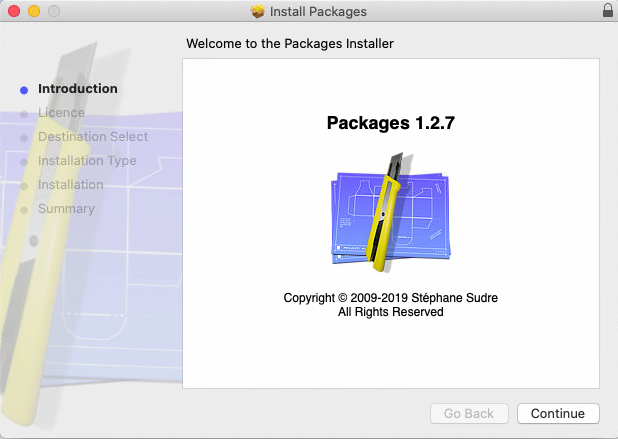
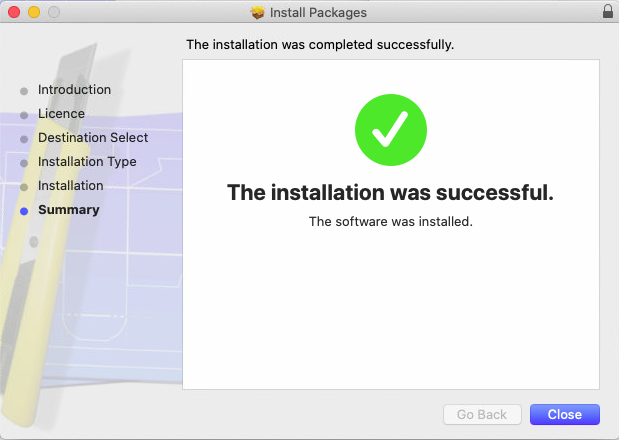
An installer is a mini-application that guides the user through a sequence of dialogs for installing your application. This involves showing a welcome message, an optional license agreement dialog, a dialog where the user can select (sub-) components to be installed, a progress bar during installation (while the installer copies files and folders to the appropriate places), finished by a “Installation was successful” dialog. This experience is very similar to what Microsoft Windows users are used to when installing an application, which I presented in the Windows-specific article. An example screenshot sequence is shown below:
Advantages:
Disadvantages:
To create such an installer, there are various installer builders available on the market, as shown in the following table.
The column Supports auto-updating indicates whether the solution assists you with at least one of the following tasks:
- Building small delta-updates, to speed up the downloading process,
- Hosting the installers (and delta-patch installers) on your server, as well meta-data (or API) that indicate version updates,
- Providing client-side applications (or code) to discover, download and install new updates from your server.
| Name | Cost / license | Supports auto-updating |
|---|---|---|
| Packages | Free / OSS | ❌ |
| Qt Installer Framework | Free / OSS | ✅ |
| InstallBuilder | Commercial / proprietary | ✅ |
| InstallAnywhere | Commercial / proprietary | ❌ |
If your chosen installer does not support auto-updating your application, you can use free tools such as Sparkle or Squirrel to add auto-update functionalities to your macOS-native application.
Application signing
As developer you should generally sign your application, to make sure that it has not been tampered with by a middle-man. This advice applies to any operating system, not just macOS. In other words, signing ensures that the application bundle your user downloads and opens is exactly the one you created and uploaded.
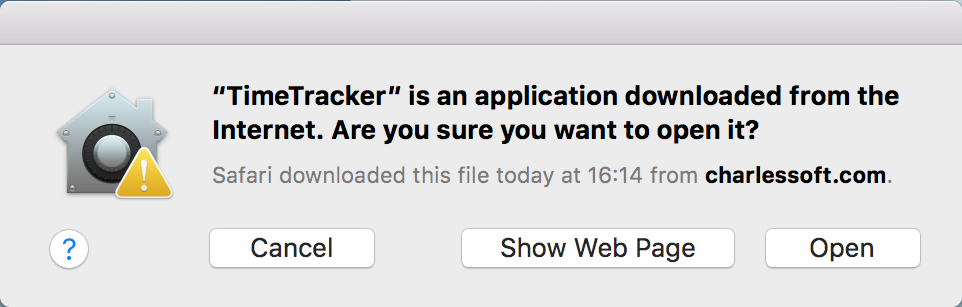
In some situations, Apple requires you to sign your application, e.g. if you publish on the app store, or if your macOS app is an ARM-native app, running on Apple silicon hardware (more details below). On macOS, it’s the job of the Gatekeeper to make sure that Applications not distributed via the app store are signed (and that unsigned apps don’t even start). See also here for more information (which has various links with further details). A user who attempts to start an unsigned application will see a dialog such as this one:
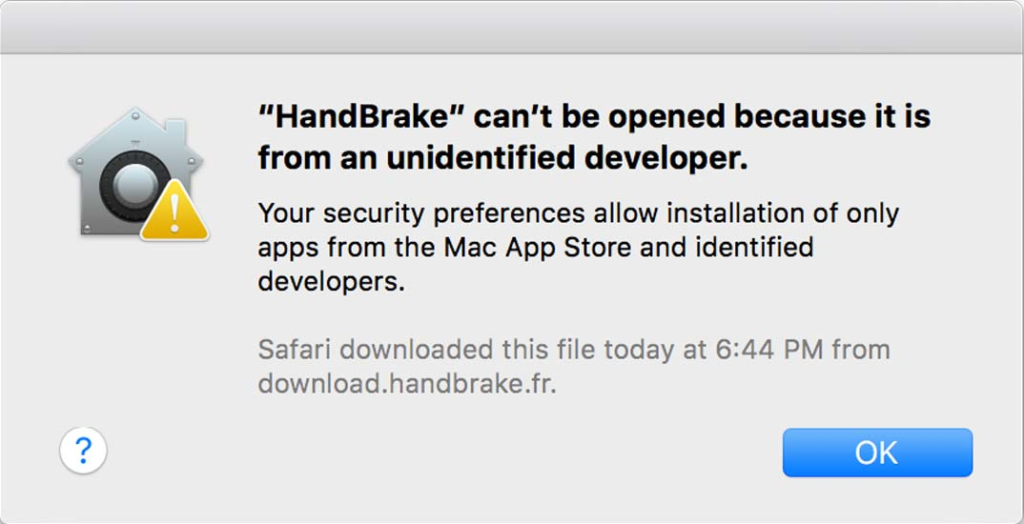
The user can still open an unsigned app by explicitly bypassing the Gatekeeper check, by right-clicking the unsigned app in Finder and selecting Open. The user only needs to do this once (not on every launch of the application).
To sign your application (and to notarize it, see next section) you will need an Apple developer account (costs $99/year). You then need to go to https://developer.apple.com/membercenter, go to Certificates, Identifiers & Profiles and create a “Developer ID: Application” certificate. In case you distribute your app by means of an Installer (see section above), you also need a “Developer ID: Installer” certificate.
The general idea is:
- Sign every app bundle with the “Developer ID Application” certificate
- Sign Installer packages with the “Developer ID Installer” certificate
- Sign the disk image (
dmgfile), if you use one, with the “Developer ID Application” certificate
Some notes and tips regarding signing:
- A signed app bundle (folder) may not be modified, ever. Once any file in the bundle is changed (or new files are created in one of the sub-folders), the application will no longer start. This means that your application may not create/modify any data inside the app bundle. For instance, you may not create configuration files, log files or any other temporary files next to the executable that resides in the app bundle. You must create such files in other places, e.g. in
~/Library/Application Support/YourSoftware. - Gatekeeper makes an exception on your own build machine. It will not check whether the app bundle is signed, which you (or your build script) just created on your own machine. To test whether your app bundle / disk image / installer really works on other people’s macs, either test it on other machines, or email the artifact (Installer, Disk image) to yourself (or upload it to a server and download it again with your browser). The Mail or Browser app will set a “quarantine” file attribute when storing the artifact on disk, which causes Gatekeeper to check the signatures.
This page contains many interesting facts about the different kind of signing certificates that exist (such as Apple Development/Distribution Certificate) and what happens if they expire.
Attention with ARM macs
As detailed here, your app bundle must be signed (or macOS will refuse to start your app) if you try to run a Universal (or ARM-only) app on a Mac with ARM CPU. In other words: if you have an ARM CPU, macOS can be made to run unsigned Intel code (e.g. via right-click -> Open), but not ARM code.
There are two ways to let your ARM-hardware users run your application:
1) Sign your app bundle. If you don’t have a real “Developer ID application” certificate, even ad-hoc signing (that does not require any certificate) will work, using codesign <bundle path> -s -
2) Open the app bundle’s Finder Get Info dialog and set it to be run with Rosetta 2 translation. This way, you force macOS to not use the ARM code (which would normally be the right thing to do), but the Intel code, being translated to ARM by Rosetta 2 at run-time.
Application notarization
Starting in macOS 10.13.6/10.14.5/10.15.X/11.X, those apps that are signed also must be “notarized” by Apple. Notarization is essentially just a glorified term for “send your app to Apple so that they can check it for viruses or other kinds of malware”. The unintentional (*cough*) side-effect is that Apple learns about all new released macOS apps, even those not published via the App store. Notarization is essentially a huge white-list of malware-scanned applications, maintained by Apple. On the just-mentioned versions of macOS, Gatekeeper will perform the following steps for signed applications whenever the users starts them:
- Check whether application already includes a valid, baked-in (“stapled”) notarization ticket (which is an optional step the developer can perform after the notarization has completed, prior to publishing them).
- If yes, start the app
- If not, consult Apple’s servers (requires Internet connection) whether the application is already on the notarization white-list.
- If yes, start the app
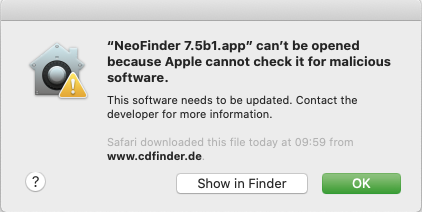
- If not (or no Internet connection available), show a dialog such as the one below
Bypassing notarization
A user can bypass the notarization check the same way as she can bypass signature verification: right-click the app and select “Open”.
A few notes about notarization:
- To notarize an app, you, the developer, need to run at least macOS 10.13.6+, XCode 10+, and have an Apple Developer account ($99/year). The basic steps are described here. Further information is provided by the team that built a third-party call called SD Notary here.
- After the
xcrun altoolcommand uploaded your disk image or app bundle archive, the server-side verification process usually takes 1-4 minutes. You will receive a confirmation email (sent to the address associated with your Apple ID) containing the result. Thexcrun altoolcommand used to upload your app can also be used to check for the current status in regular intervals, which is useful for CI pipelines. - You can upload any app to Apple for notarization. It doesn’t have to be your own application. You can, if you want, notarize other people’s applications. For instance, if you are a fan of some application whose developer forgot (or is unable) to notarize their app, you can do it for them!
- As described here, your signed application also need to have the “hardened runtime” enabled.
Conclusion
With application signing and notarization being the default nowadays, you should familiarize yourself with these concepts, and implement them for your application. The more difficult choice is to find the right distribution path. You might first want to verify whether you rely on the App store, which provides the most streamlined experience for your end-users, but has massive disadvantages for you as developer, such as costing you a 15-30% fee on earnings (see here for more information), or requiring you to follow strict guidelines. Since package managers (like Homebrew) are tailored for open source applications and libraries (and assuming you are building a commercial app), your remaining choice is between disk images and installers. My rule of thumb is: if you don’t need the extra features of an installer, don’t use one, and stick to a simple disk image.
This article only covered macOS, so be aware that efforts increase even more, because deployment mechanisms differ for each platform/OS. If you are a solo developer, that’s tough luck. If you are company, consider hiring a specialist, such as a release engineer, who will get the job done faster and better, thanks to prior experience.
1 thought on “Distributing macOS applications”